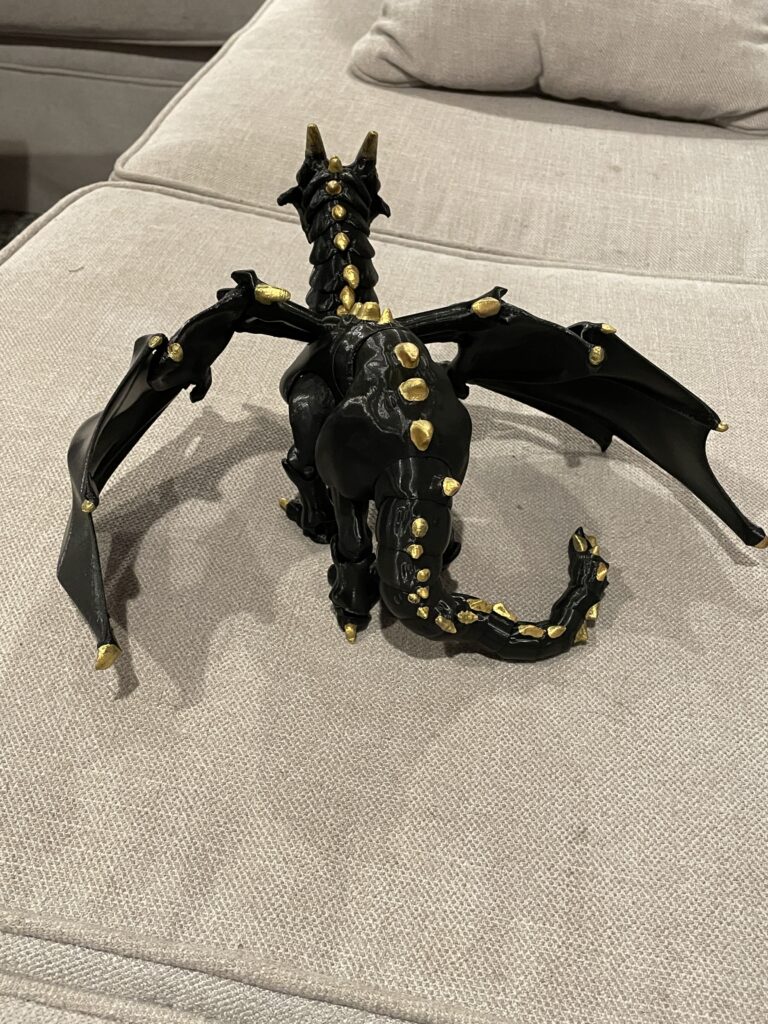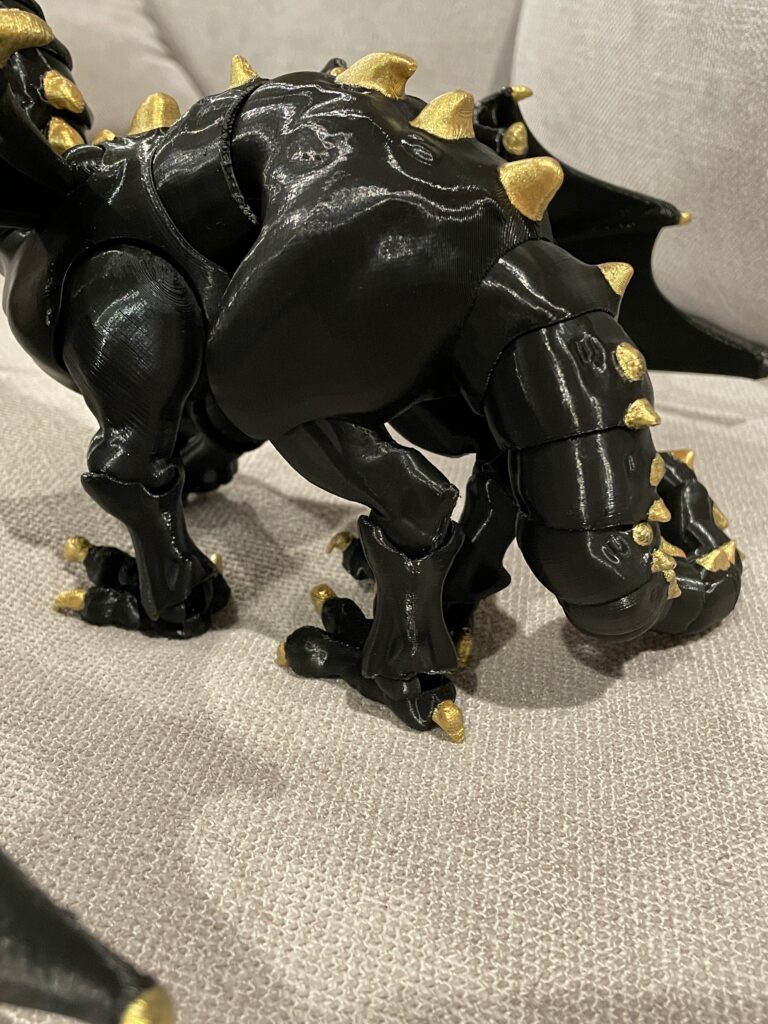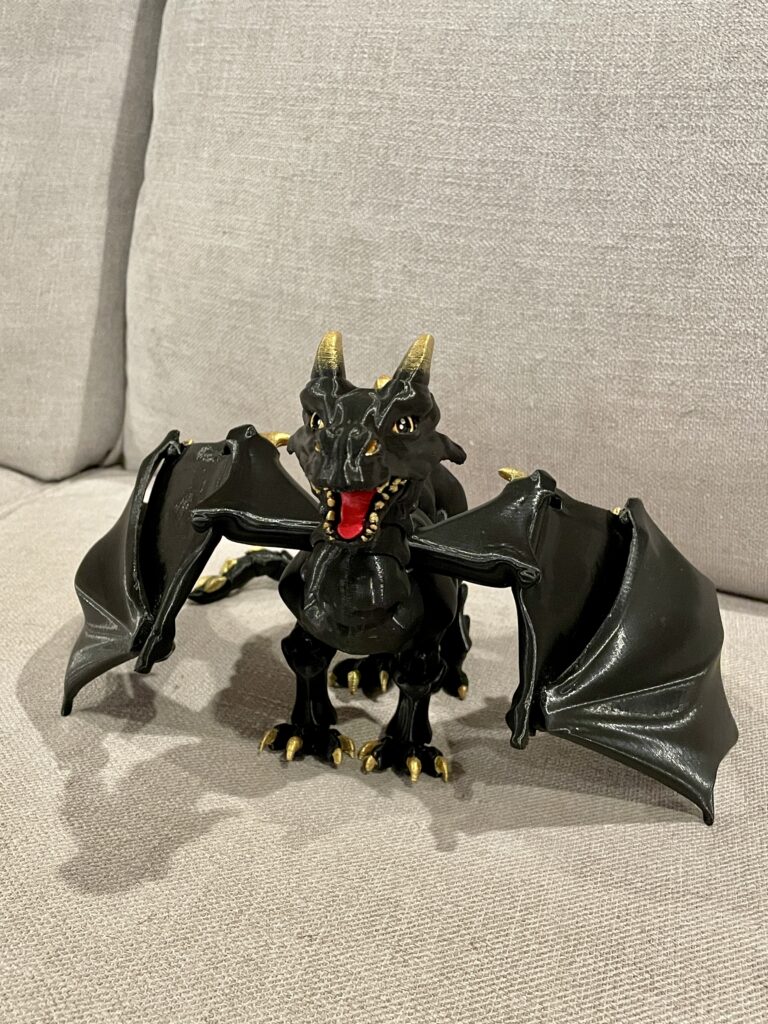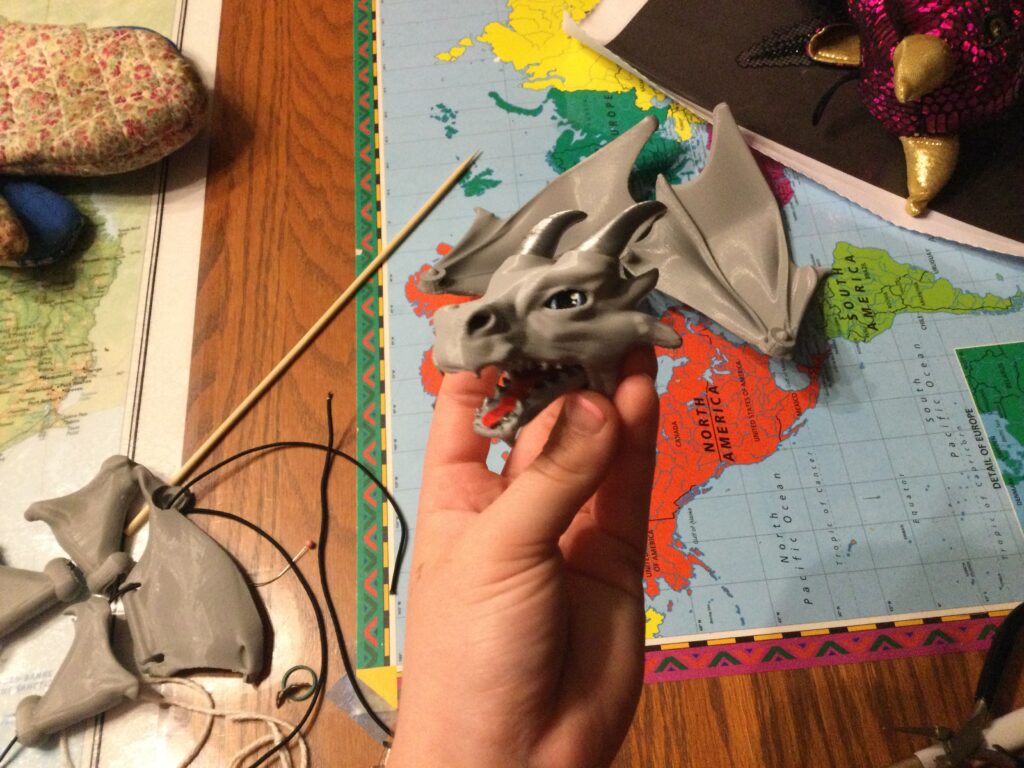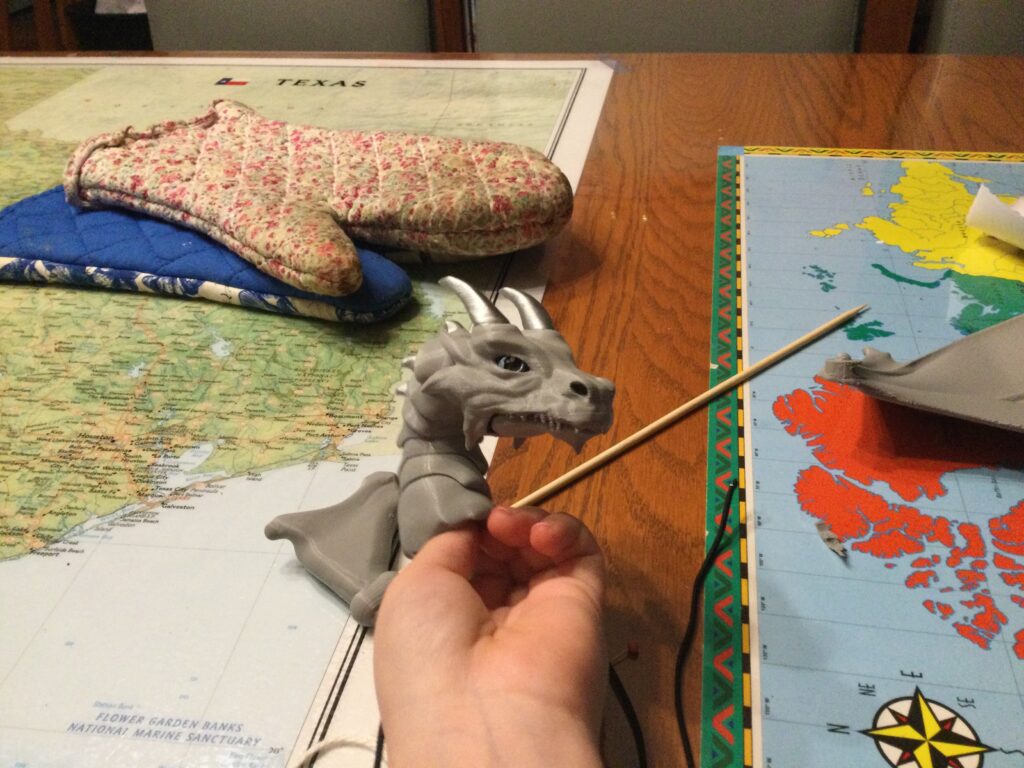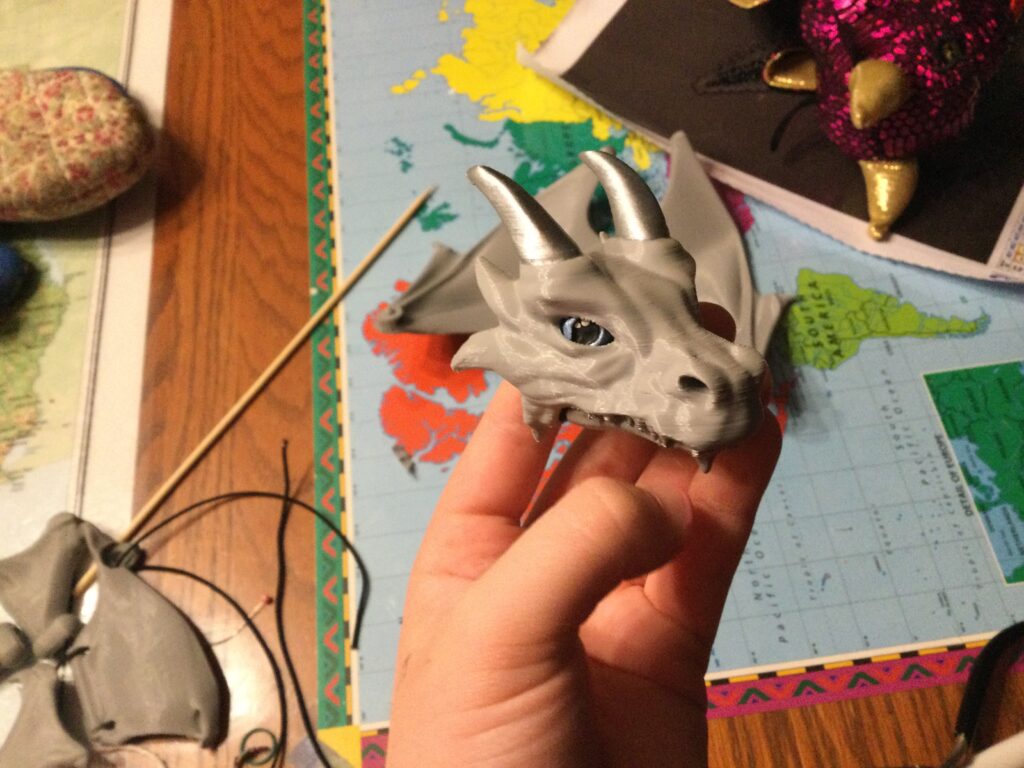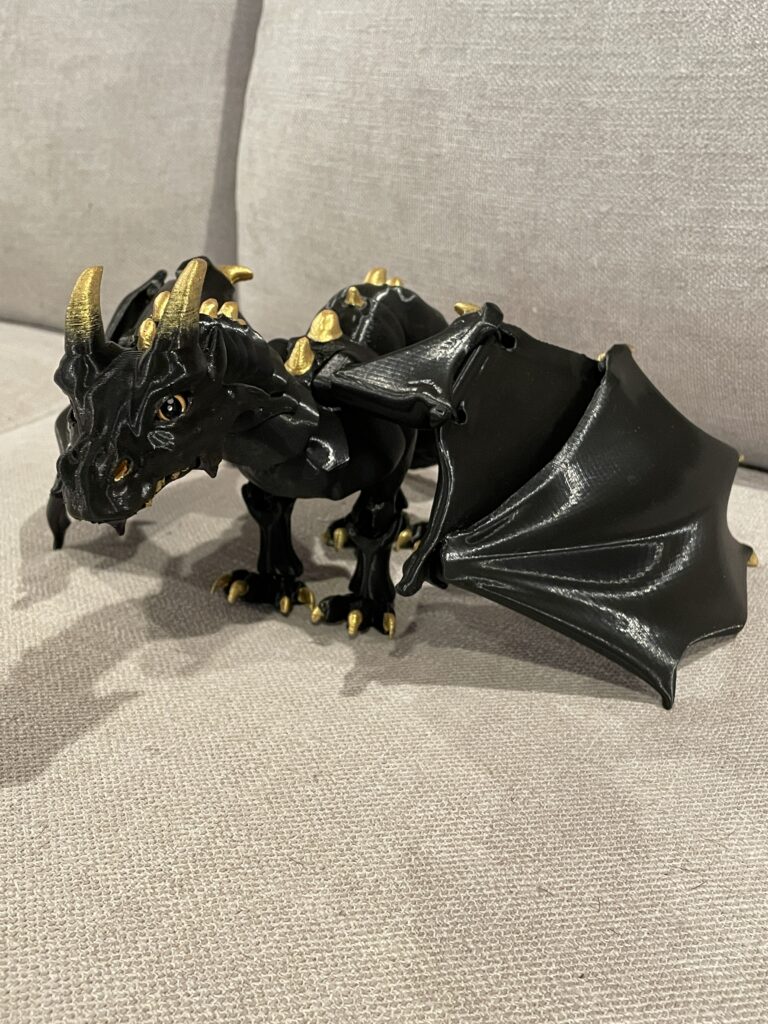
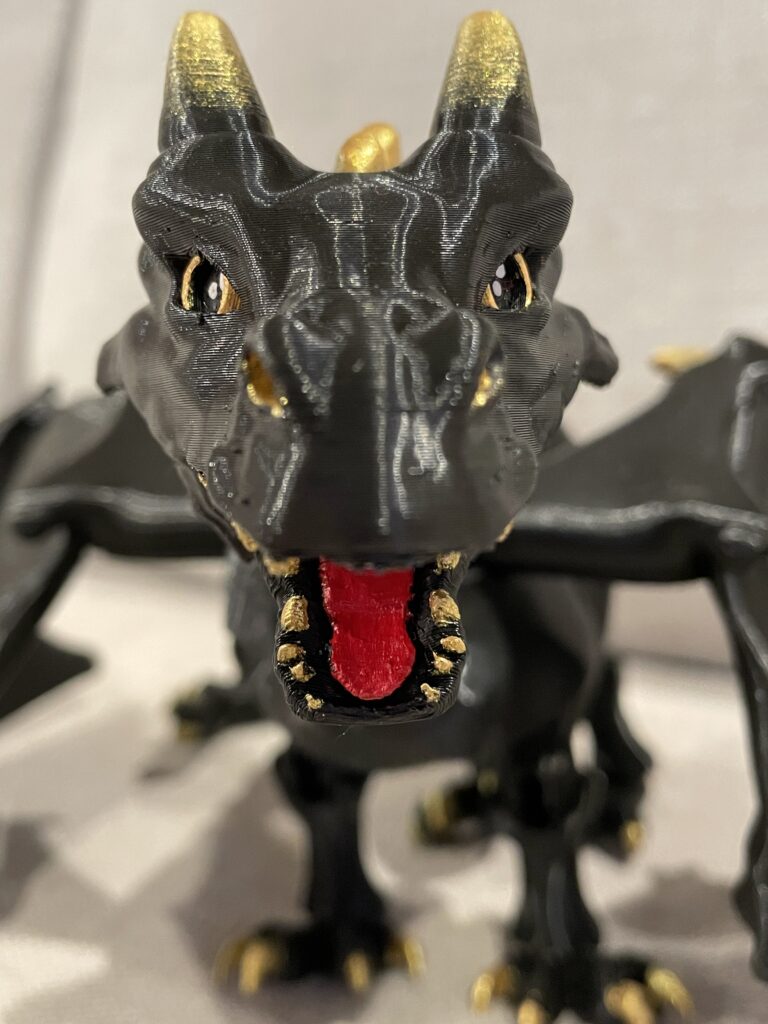

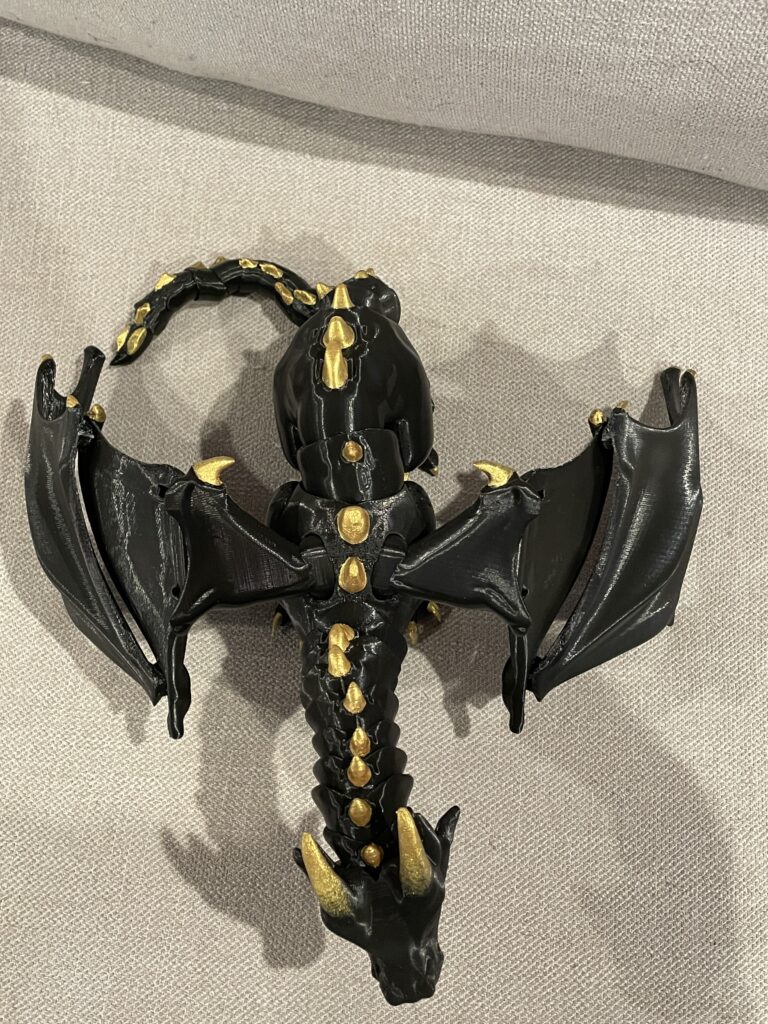
We purchased a Creality Ender 3 3D printer and started with your average beginner prints. Once we mastered that, we moved on to more ambitious projects. We hopped on Thingiverse, began searching for the perfect project, and stumbled upon this 42 piece articulated dragon. A lot of other creators on the site remixed the dragon and fixed some issues or offered more articulation and variety. After grabbing our favorite files we began printing! We used Hatchbox 3D printer filament in the colors black and cool gray.
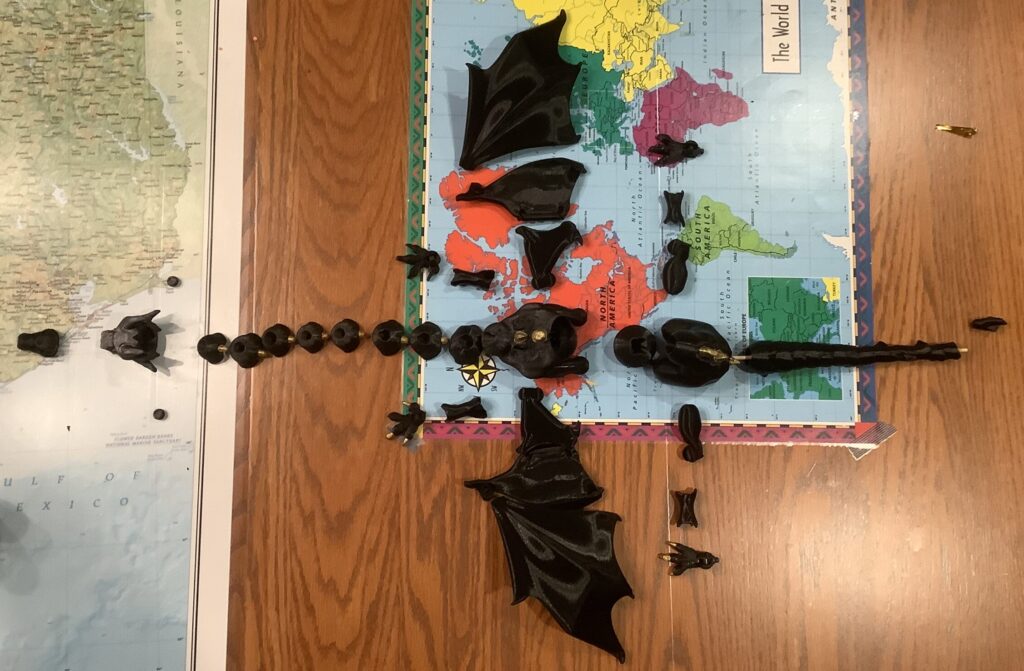
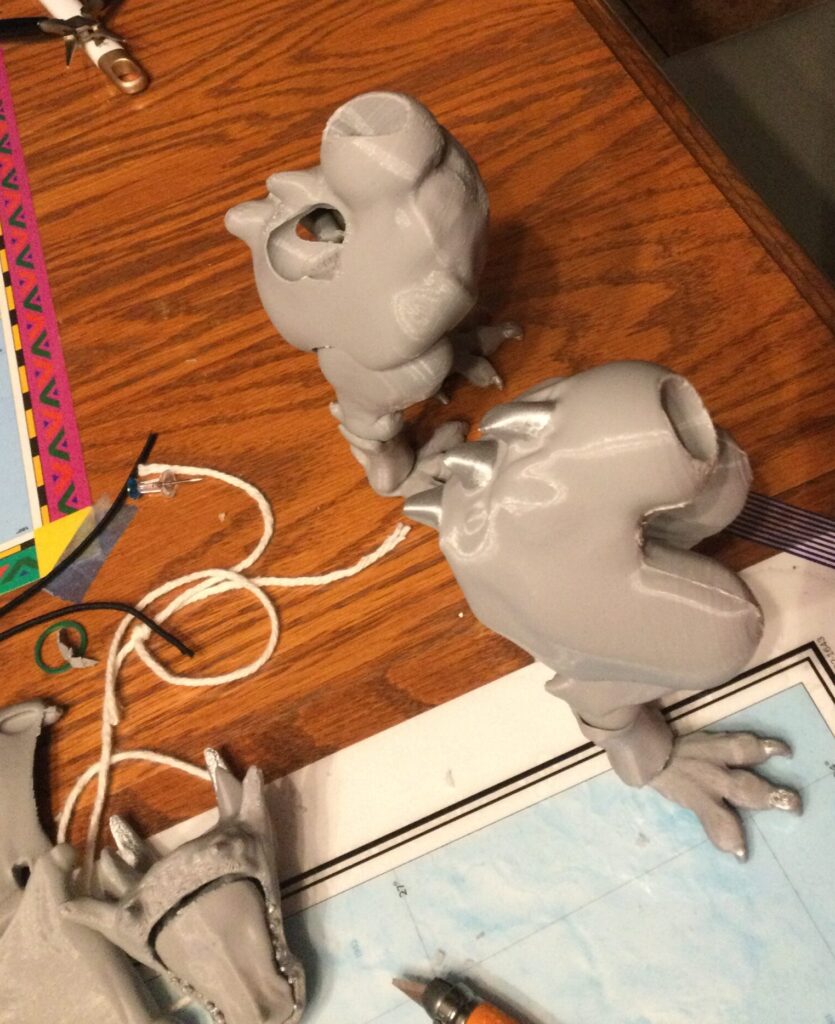


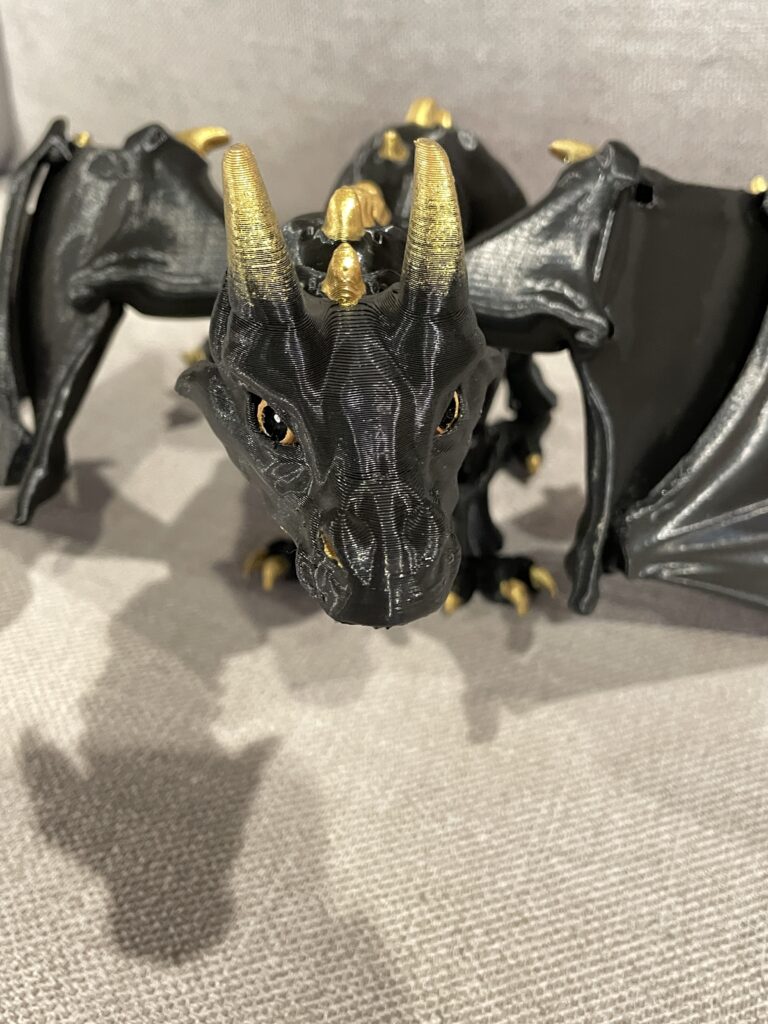
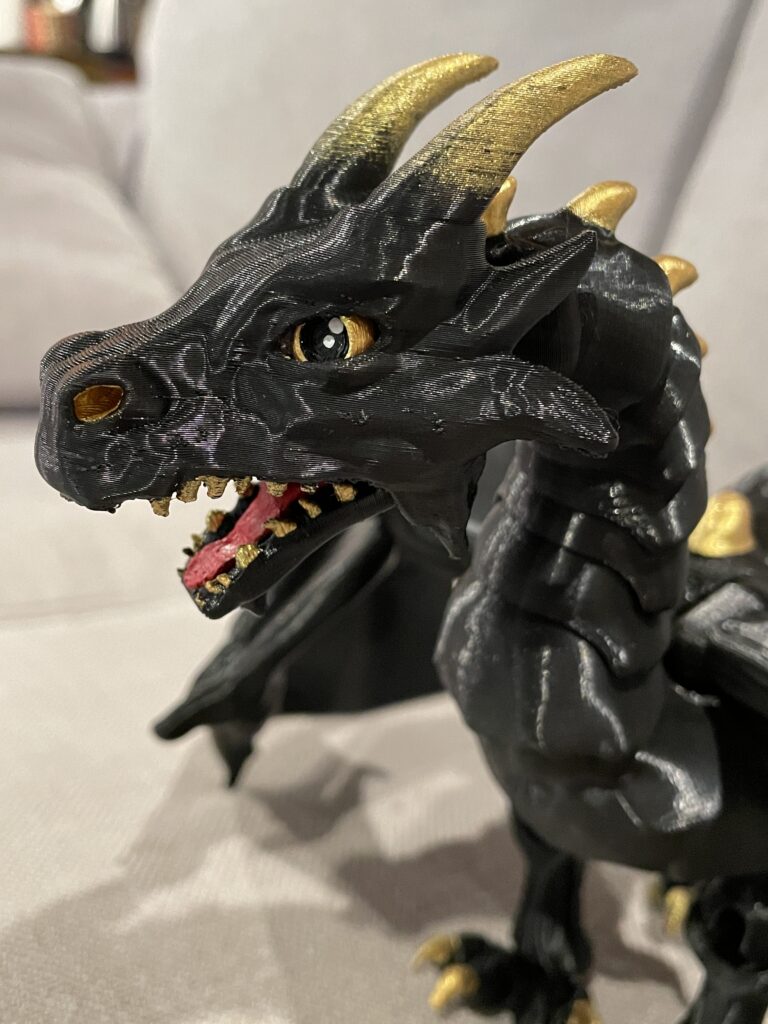
We decided on an articulated mouth which proved to be difficult but so worth it! Placing the eyes in the right orientation and painting them with white dots created a “follow me” effect. The head and the eyes were the most difficult parts to print/paint. I ended up reprinting and painting three heads before it came out right. The whole dragon took a week to make! Printing, painting, and assembly are the most time-consuming part of the process. The assembly was logical and easy, it just took a while to get all the right pieces in place. We used black elastic cord to string everything together and attain the necessary tension that allowed the dragon to be articulated. The original maker even has a video on how to assemble the dragon. We loved the dragon so much that we ended up making two! One gray and silver and the other black and gold.
Here are some of the different supplies we used!
Creality Ender 3 3D printer
Hatchbox 3D printer filament
elastic cord
*As an Amazon Associate, we earn from qualifying purchases.*