“A sound, too, began to throb in his ears, a sort of bubbling like the noise of a large pot galloping on the fire, mixed with a rumble as of a gigantic tom-cat purring. This grew to the unmistakable gurgling noise of some vast animal snoring in its sleep down there in the red glow in front of him. It was at this point that Bilbo stopped. Going on from there was the bravest thing he ever did.” J.R.R. Tolkien, The Hobbit
I wanted to make a diorama in a chest, and I knew something underground would be best. There were also some features I wanted to include in this project. First, a realistic LED breath of fire. Second, as much of Smaug’s body as possible. We will get to the dragon soon, but for now, let’s get to making a cave.
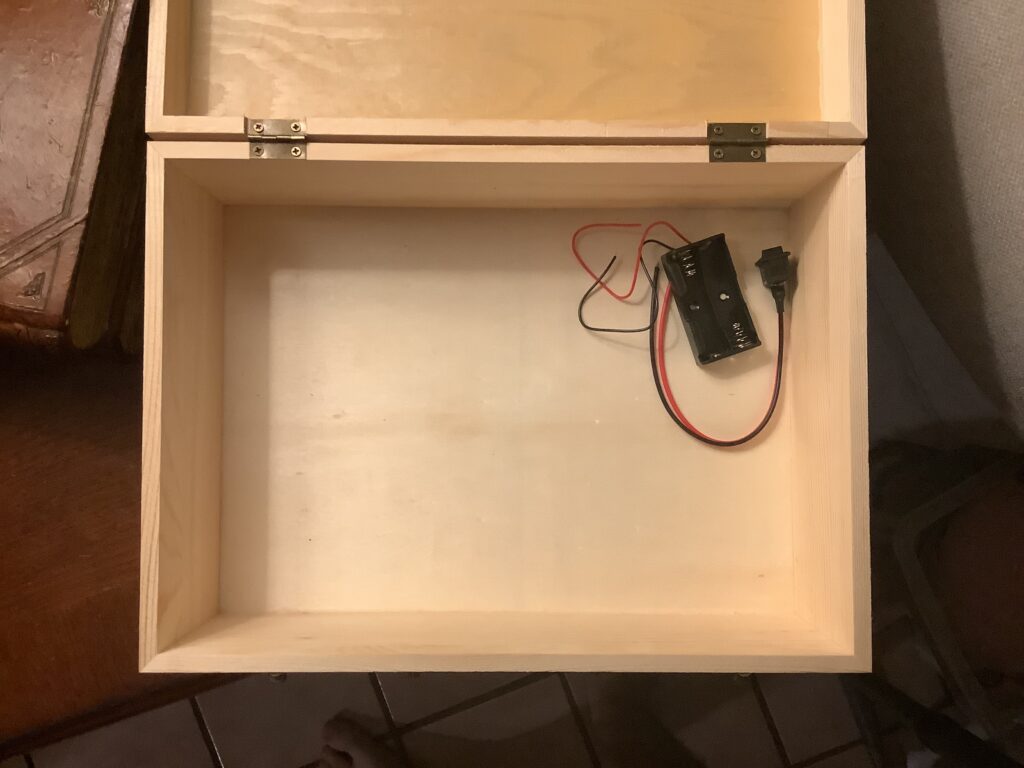
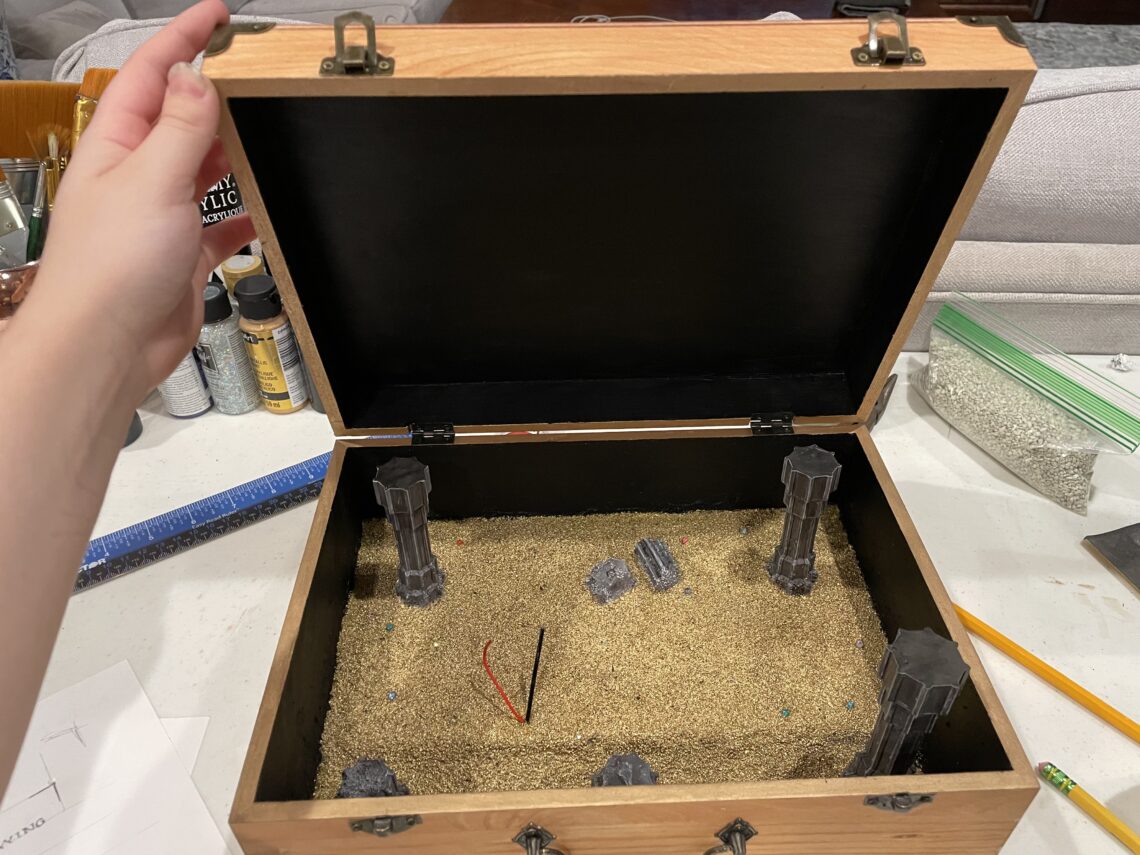
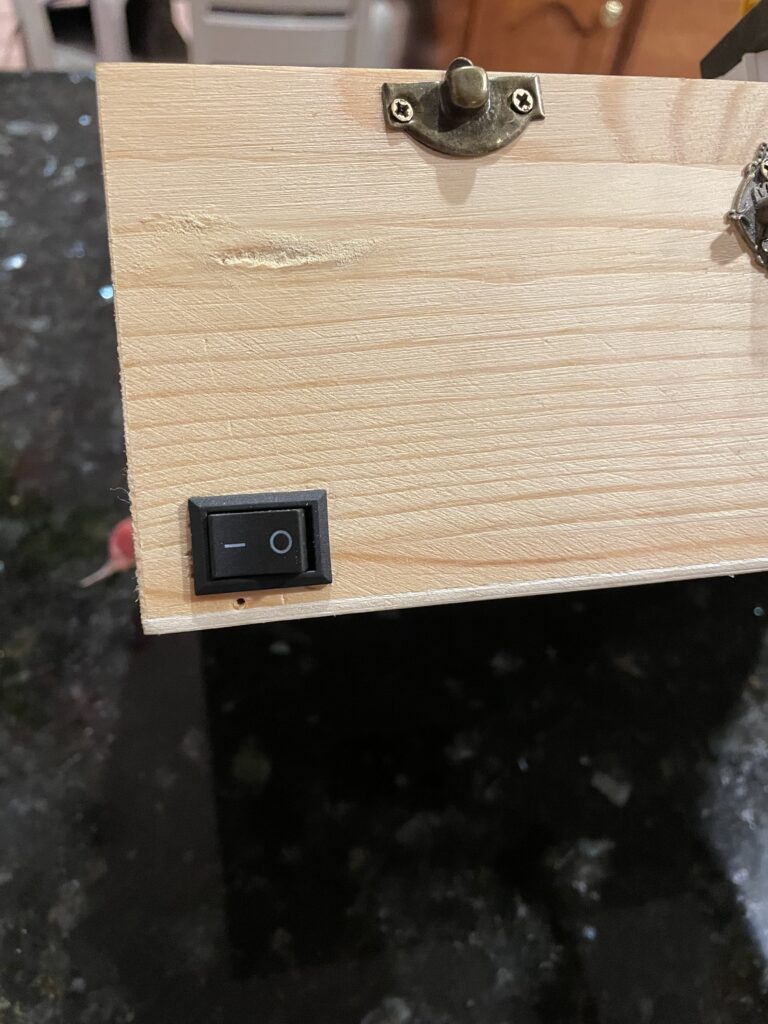
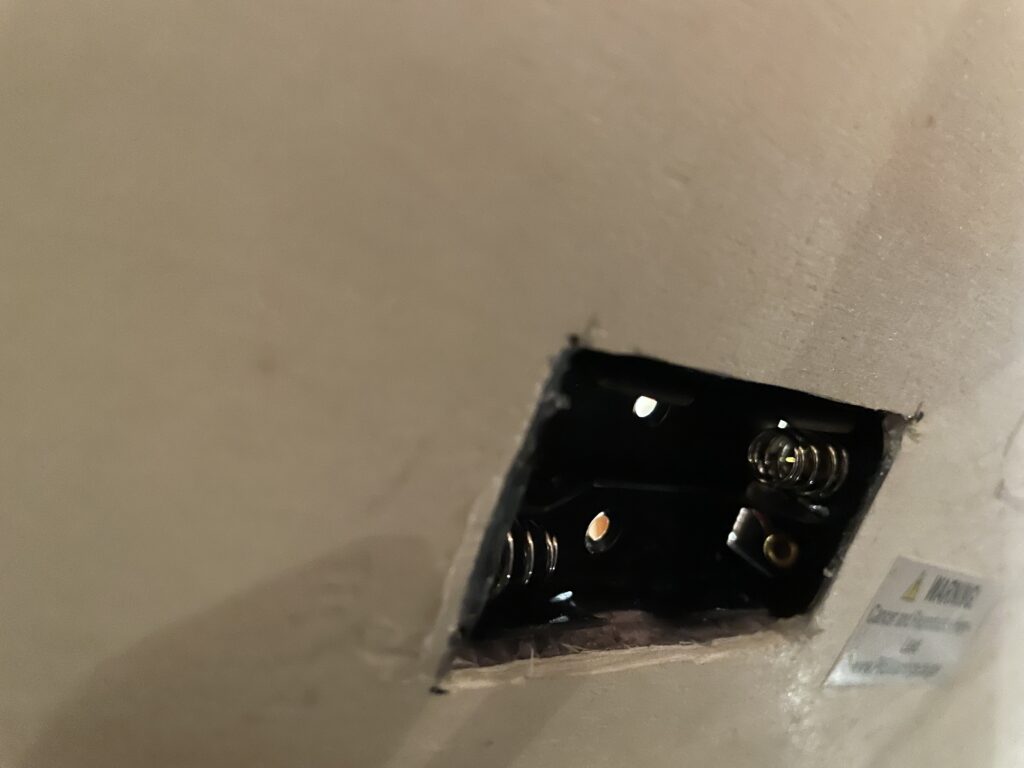
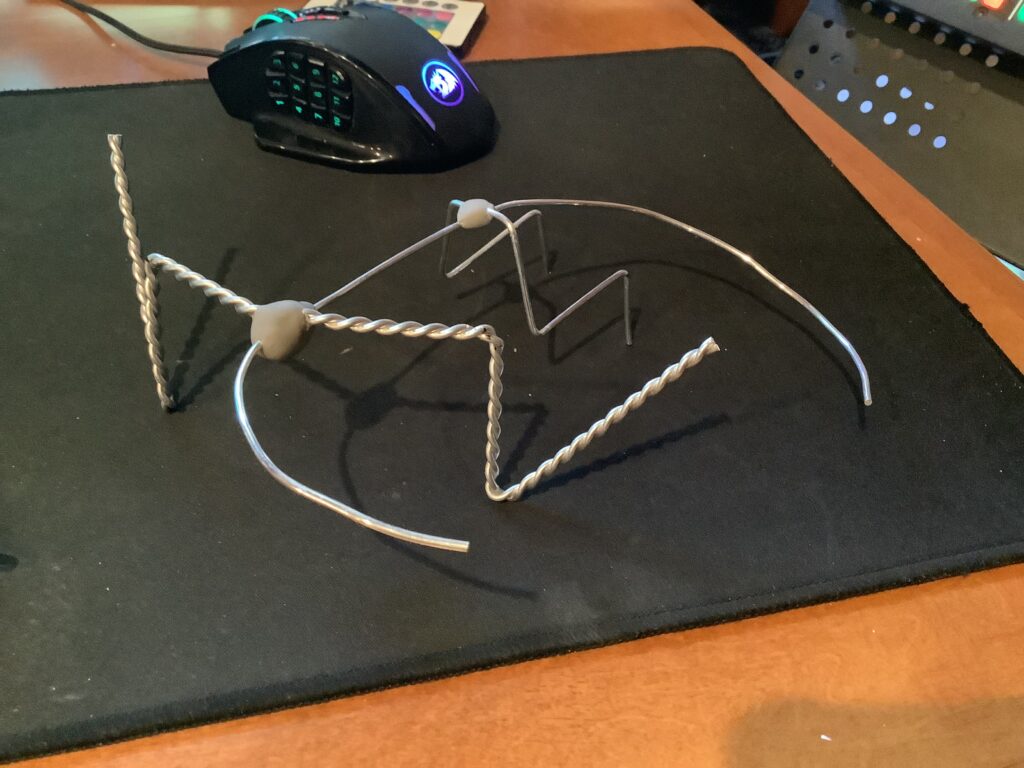
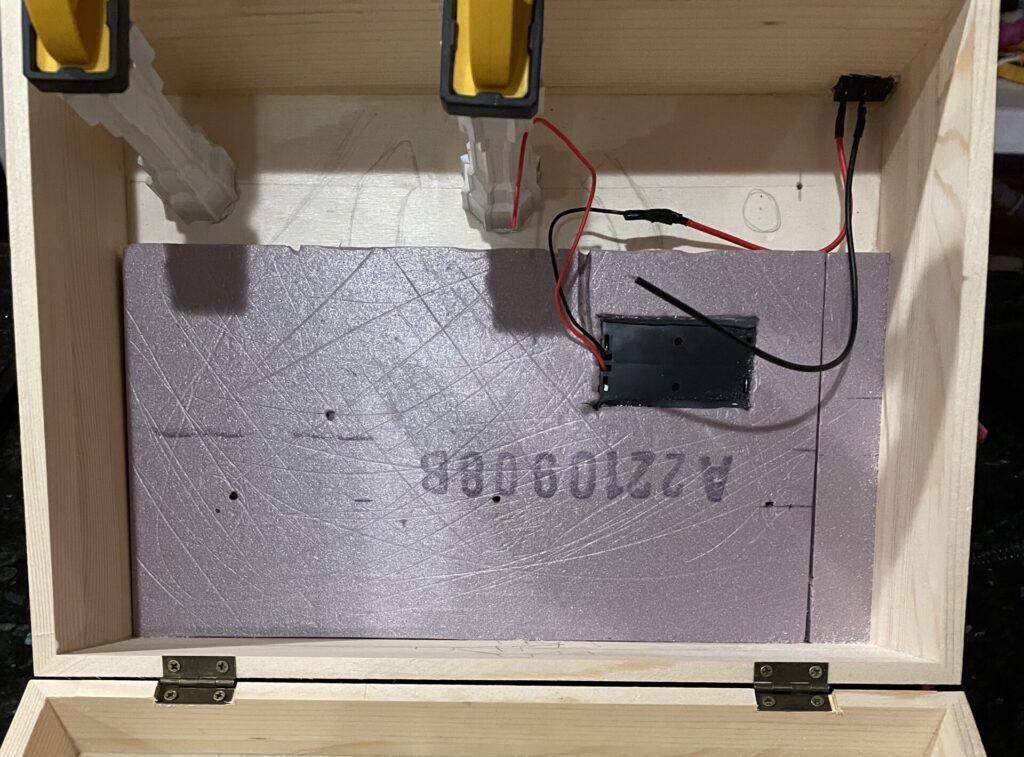
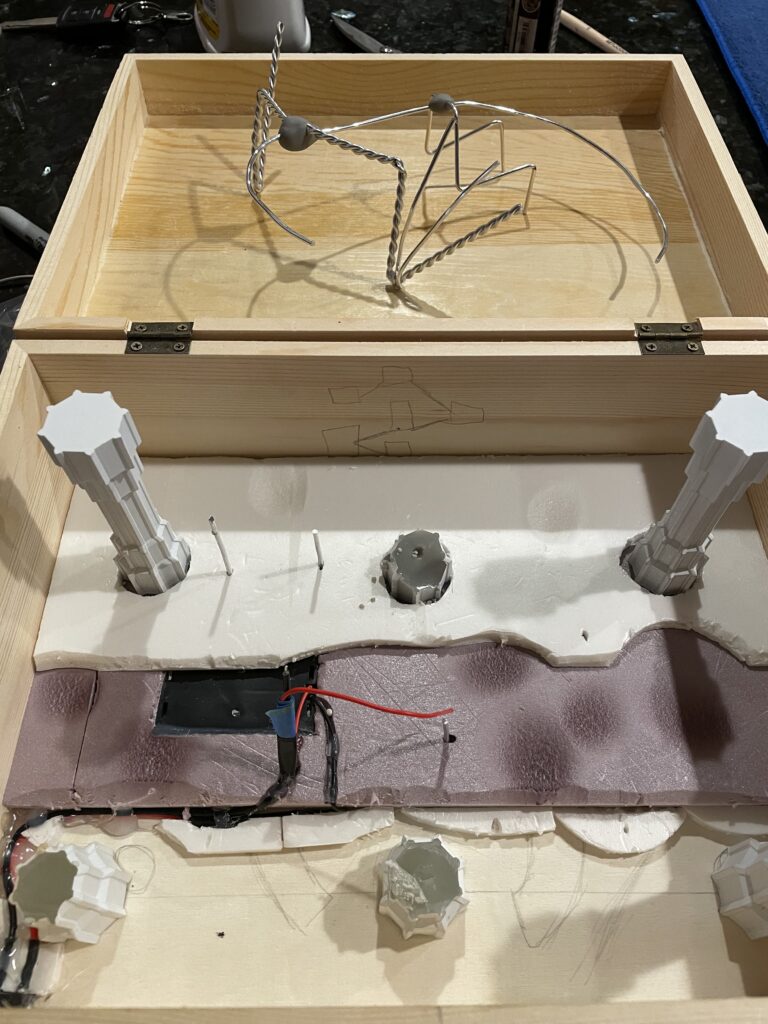
To begin this project I found a wood chest with an inside size of 8” by 11” by 5.5”. Then I gathered electrical components to start mapping where everything will go. I used a Dremel to carve rectangular holes for the switch and the battery pack on the bottom. I made a drawing of the plan and layout but lost the drawing, so I can not show it here. I made an armature wire frame of the dragon to compare to the layout.
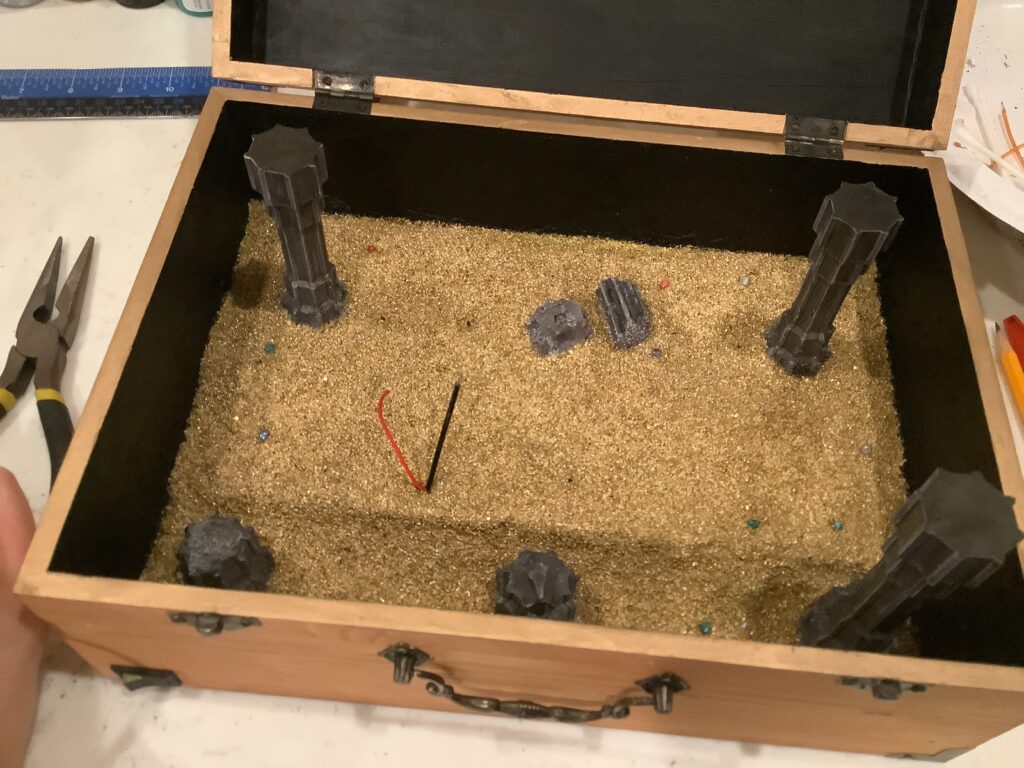
After the armature was built, I added layers of pink foam to form different levels, according to the plan. All of the electrical components are connected under the foam, and a small hole is cut into the foam over the battery so the exposed wires are directly under the dragon. After installing the wires I tested the circut with the LED filament and it worked. Then using Blender 3D modeling software to make some pillars, I 3D-printed three large and three small pillars on my Elegoo resin printer. I then put one small and two big pillars in a plastic bag, wrapped the bag in a cloth, and hammered the parts to break the pillars into pieces with a natural look. For an even more realistic look, I glued sand and small pebbles to the broken pillar pieces. After this, I drilled holes into the pillars and corresponding holes in the base. Then I used Gorilla Glue to secure them in place.
I used an Exacto knife, a blow torch, and foam cut-offs to refine the base’s shape. The next step was to add a texture paste to protect the foam. This paste is made of paint, modpodge, and plaster. I applied the paste across the entire base and tried not to get it on the wall or pillars. While it was still wet, I sprinkled on the sand. I wanted to create collapsed pillar rubble on the ground, so I made an impression into the ground by pressing the pieces into the paste. I then removed these pieces, so I could later paint them and add them snugly into the depression. I used watered-down PVA glue and isopropyl alcohol to apply more sand to the ground when the paste dried. I forgot to mention this, but I taped off the wires to keep them clean. After the glue was dried, I used a brush to remove any loose sand.
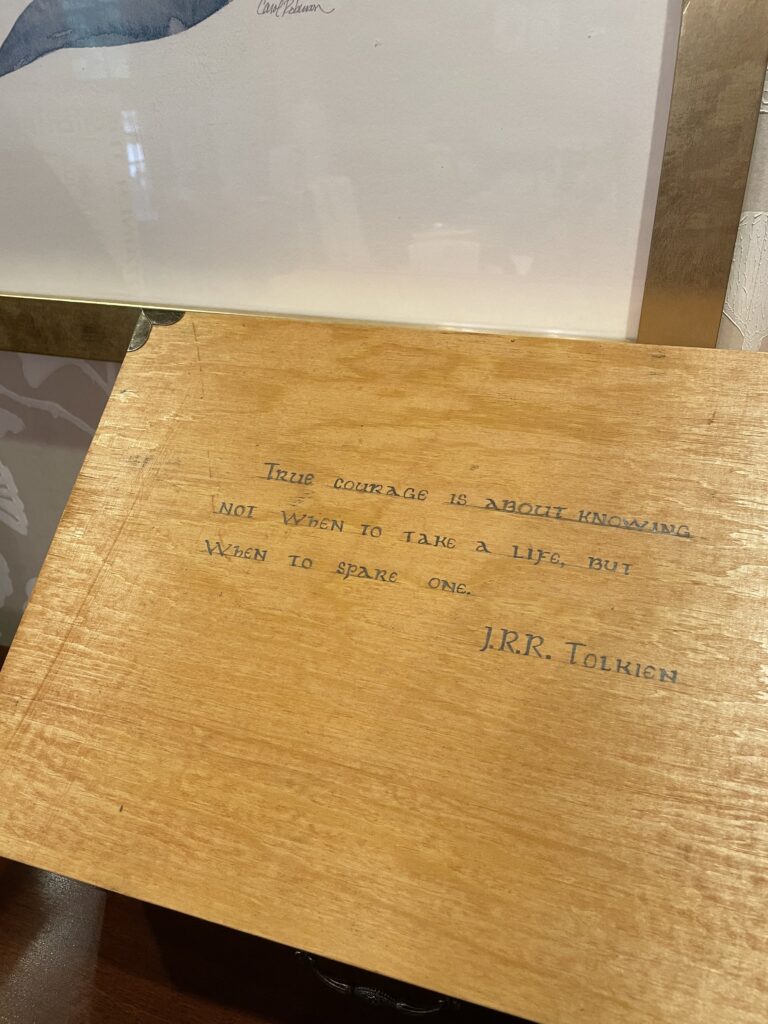
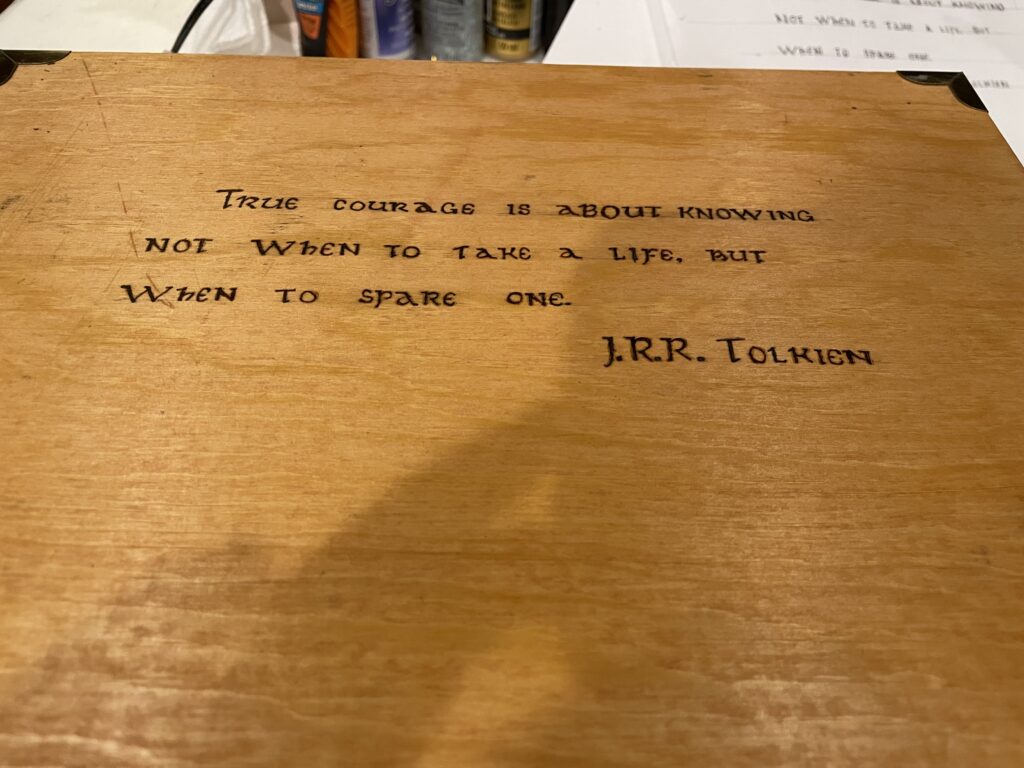
I masked off everything but the sand floor and spray-painted the floor gold. The pillars got a gray base coat, black wash, and a light gray dry brush. I painted the pillars before putting them in place. Also, Chloe added small, glittering gems for more details. The inside wall and inside of the lid got multiple coats of black paint and the rims of the box were painted gold. Chloe chose a quote from The Hobbit and practiced writing it on a piece of paper in the font from the movies. After this, she wrote it again, this time on the chest, and wood burned it onto the lid. Before she did this, I applied a golden pecan wood stain.

I had a lot of fun making this item. Keep an eye out for the second part of this project. Because next we will create the dragon!
Quick links from this post:
Power Switch
Battery Pack
Simler Wood Box
Foam
Armature Wire
Exacto Knife
Blow Torch
Wood Burner
Modpodge
Perfect Plaster
Elegoo Resin Printer
Dremel
PVA Glue
Isopropyl Alcohol
Gorilla Glue
LED Filament
*As an Amazon Associate, we earn from qualifying purchases.*